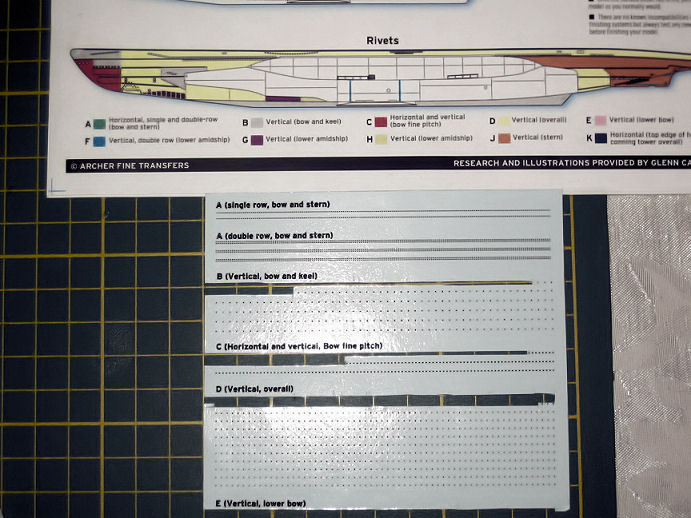
Rivets
So far I have done a lot of work to detail the hull, and as a result I have lost a lot of surface rivets due to cutting, puttying, and sanding. Originally I thought about installing individual round-head rivets (such as from Grandt Line) but I was not thrilled with the prospect of all the drilling and gluing I'd have to do. (Not to mention that making straight, evenly-spaced rivet rows would be nearly impossible to do by hand.)
I discovered that Archer Fine Transfers offers a collection of surface detail rivets in 0.011" size (same as the U-boat rivets). However, this generic rivet sheet has the rivets laid out using only a few set spacings that do not match any particular rivet spacing on the U-boat. If I used that generic sheet, I would still need to apply the rivets 1-by-1 to get the proper spacings. As such I would be facing nearly the same issues as with installing individual plastic rivets: tedious, time consuming, crooked & unevenly-spaced rivet rows.
Great Idea Borne of Necessity — 1/72 Revell U-boat Super Detail Set (by Archer Fine Transfers)
Archer Fine Transfers and I collaborated to create a “surface details” set specific to the 1/72 Revell U-boat kits. Such a set would contain different “rivet groups” that would match the different rivet spacings on the kit hull & conning tower, as well as properly-shaped weld beads for the hull.
For the rivets, the ultimate goal was to create rows of rivets that you quickly and easily apply to any part of the U-boat hull or conning tower. Imagine it: replacing entire rows of rivets in a few easy steps!
So then the hard part began: researching and analyzing rivet patterns on the U-boat.
I never thought I’d add “Rivet Counter & Analyzer” to my repertoire, but that’s exactly what I did.
It turns out that the U-boat kit has 10 distinct rivet groups of different sizes, pitches, and separations. The majority of the rivets have a 0.011" diameter, but some are smaller rivets (0.008") that have closer spacing.
What resulted was the Archer Fine Transfers 1/72 Revell U-boat Super Detail Set which includes detailed instructions for rivet & weld placement. It is a massive 3-sheet package containing 3D resin rivets and weld beads on clear decal film to replace surface details lost to sanding (or to correct the kit details).


Preparing to Apply the Rivets
To prepare to apply the surface detail rivets to the hull, I had to finally – gulp – prime the hull... yoiks!
For priming the hull I used the following:
- Iwata Revolution CR dual-action airbrush
- Iwata Power Jet air compressor
- Alclad II Lacquer Gray Primer and Microfiller
- 15~20psi air pressure


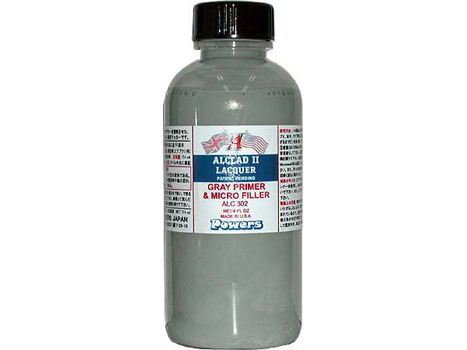
The Alclad II primer adheres well to the plastic hull and brass photoetch (of which there are many large & small pieces on the hull). The primer comes pre-thinned and ready to spray, and dries quickly to a matt, light grey colour.
After the primer had dried for 24 hours, I airbrushed a few light coats of Future Floor Wax (airbrushed straight from bottle at 15~20psi) onto the areas where I would be applying the rivets. The 3D resin rivets apply like waterslide decals, so they apply much better to a smooth (gloss) surface. After the gloss finish had dried, I used a fine pencil to mark the guidelines for the new rivet rows.

Realizing the Dream — Applying the Rivets
I can honestly say that all the time & effort spent on creating the 1/72 Revell U-boat Super Detail Set was well worth it!
This set makes it very easy to add new rows of rivets (as well as weld beads).
- Determined the area on the hull where I was going to apply a new rivet row.
- From the placement chart included with the Archer set, I found out which rivet group goes in the particular area.
For example: the small, tightly-packed rivets near the bow torpedo doors are “group C” rivets. - Measured the length of a rivet row I was going to apply.
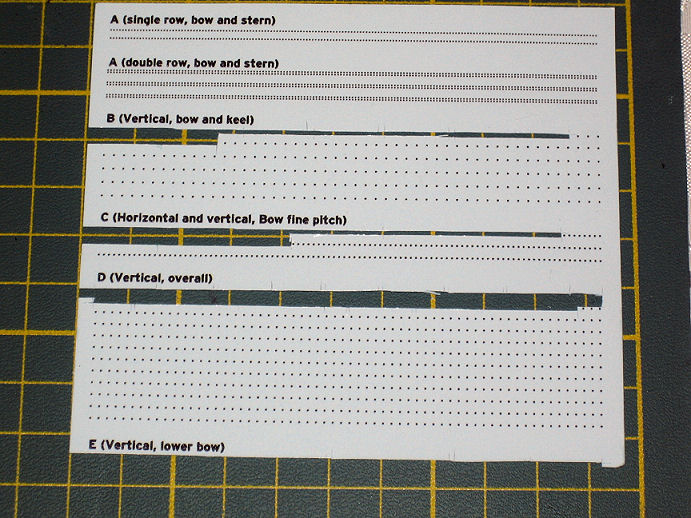
- Found the appropriate rivet group on the sheet, and cut out the proper length of rivets.
- Applied the rivet row like a regular waterslide decal, using Micro Set and Micro Sol decal-setting solutions.
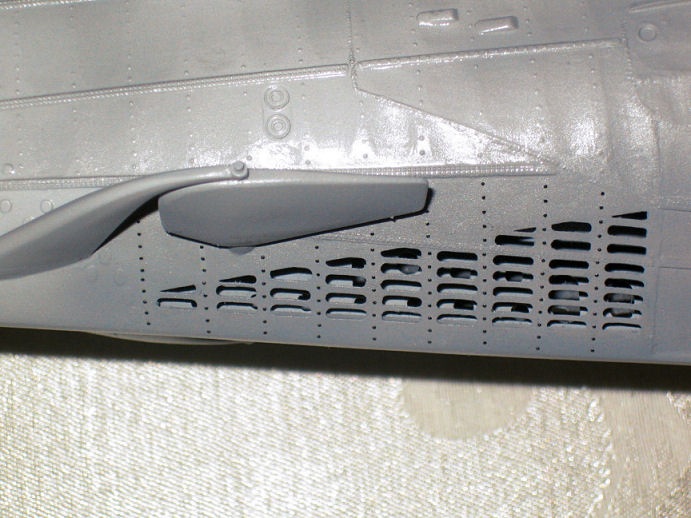
In addition to the straight rivet rows and weld beads, the Archer set also includes a few “special” patterns. Of particular note is the 1-piece bow rivet pattern that runs along the forward edge of the bow.
I think the photos speak for themselves. All of the black dots are 3D resin rivets!
I can honestly say that all the time & effort spent on creating the 1/72 Revell U-boat Super Detail Set was well worth it!
This set makes it very easy to add new rows of rivets (as well as weld beads).


REVIEWS
The Archer set has received very good reviews at the following sites:
I have also written my own personal review HERE.