Propellers & Diving Planes
Propeller Shafts and Propellers
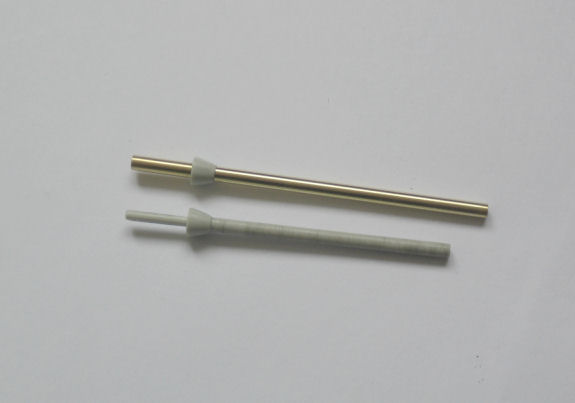
As with U-625 I selected not to use the kit propeller shafts. No matter how well you sand & polish plastic propeller shafts, using brass tubing always seems much more realistic. For U-625 I was fortunate enough to have some very nicely-crafted 1-piece turned brass propeller shafts with collars (an exact duplicate of the kit originals), but for U-673 I had to make my own.
I cut to length two pieces of 1/8" brass tubing, then chucked them up in a slow-turning drillpress so I could polish them nicely. Turned out beautifully!
Then the tricky part came; cutting off the tapered collar from the kit propeller shafts and drilling a perfectly-centred hole so the collar would be concentric on the tubing. I think I used 6 or 7 drill bits of increasing size to reach the final hole size that is a slight press fit onto the brass propeller shaft.
The 1/8" brass tubing is slightly larger than the kit part, so everything had to be drilled out to the larger size: shaft packing assemblies (where shafts exit the hull), tapered collars, propeller supports, propellers. TWICE.
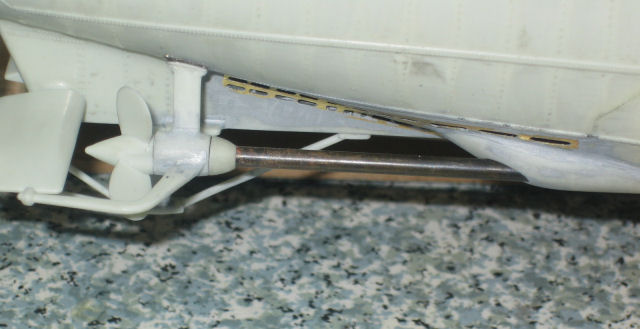
Again I used the kit propellers, painstakingly shaved and sanded and smoothed and knife-edged.
One of the nice things about using brass tubing is that I could blacken it using the same JAX Pewter Black electrochemical solution as I used on other PE pieces for the deck. This imparts a very nice finish to the prop shafts.
Bow Diving Planes
A bit of attention was paid to the bow diving planes in order to correct some kit issues, and enhance the pivot shafts.
The large but shallow sink holes in both bow planes were filled with Tamiya Putty and smoothed.
PE detail plates were added from the Eduard set.
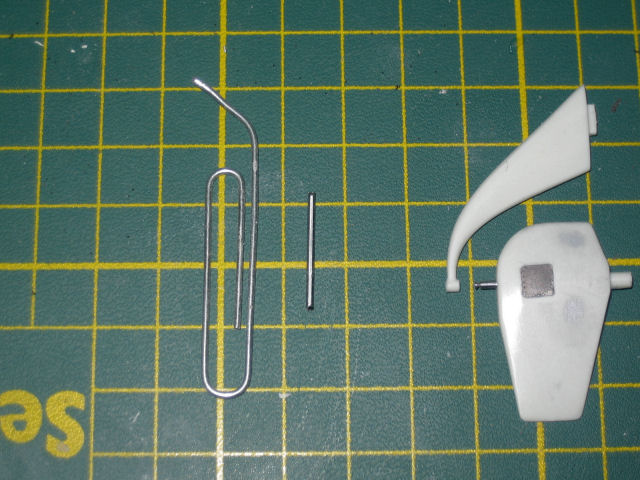
I cut off the small plastic pins from the outside edge of each bow plane, and replaced them with shaped metal pins.
I used a large non-corrugated paperclip for the metal pin... perfect size.
Before gluing the metal pins in place in the bow planes, I filed a shallow groove near the end of each pin.
(Note: a drillpress really comes in handy for polishing and making grooves in metal pins.)
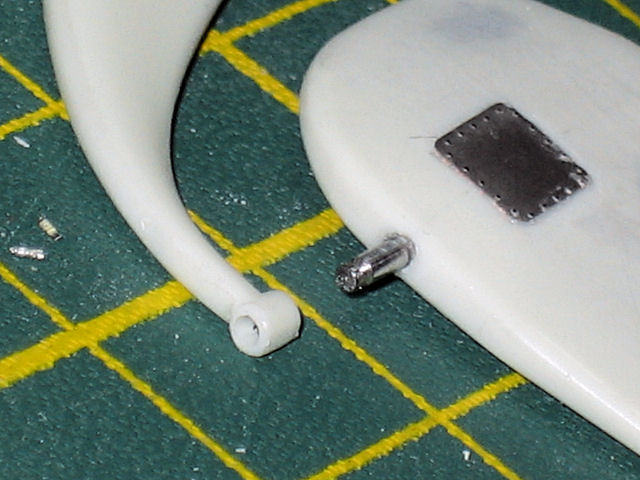
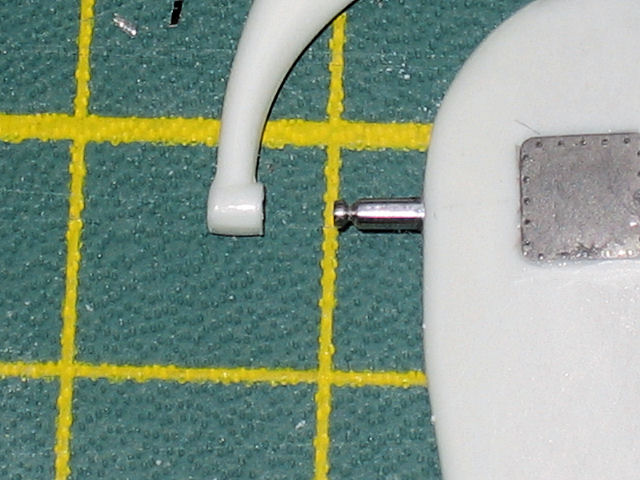
I then drilled a corresponding sized hole in the end of each bow plane support for the pins to slide through.
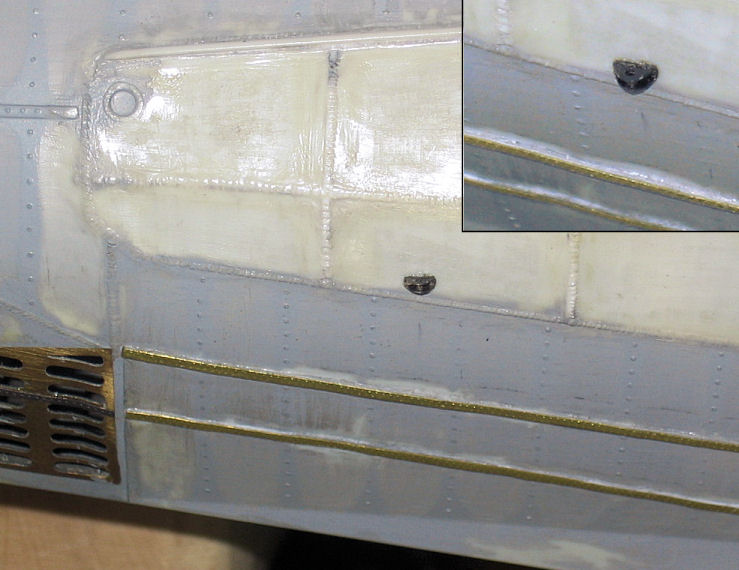
The pivot shafts extend slightly beyond the bow plane supports, and a tension cable connects the pivot shaft to the pressure hull.
I used a PE mount from the Eduard PE set as the hull mount bracket; it is mounted on the pressure hull, not the hull casing.